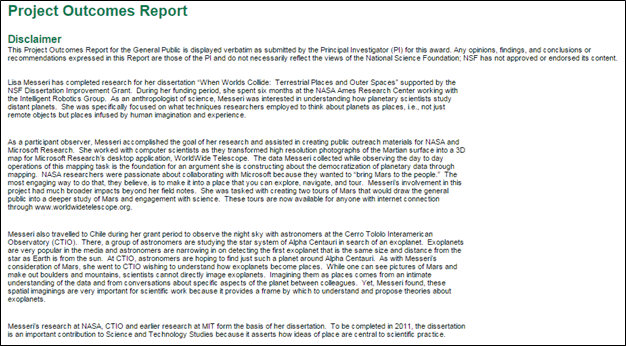
Preparing and Submitting
Your Report
Preparing Your Report
To
prepare your report:
- Click
on the Project Outcomes Report link provided on the Project
Reporting Dashboard of your Research.gov Homepage to view,
prepare, and submit reports.
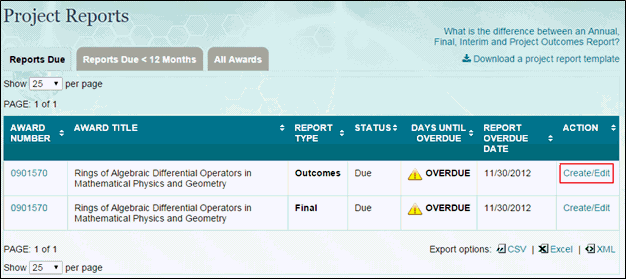
- Select
the report you would like to complete.

Figure
5 – Project Reports
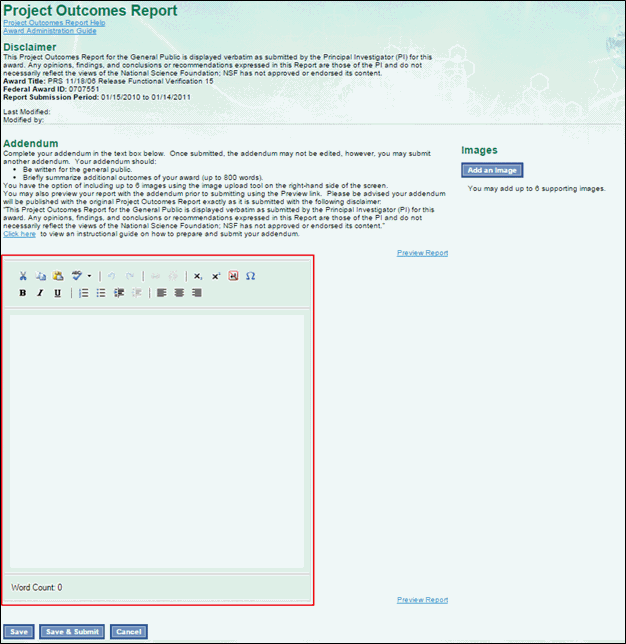
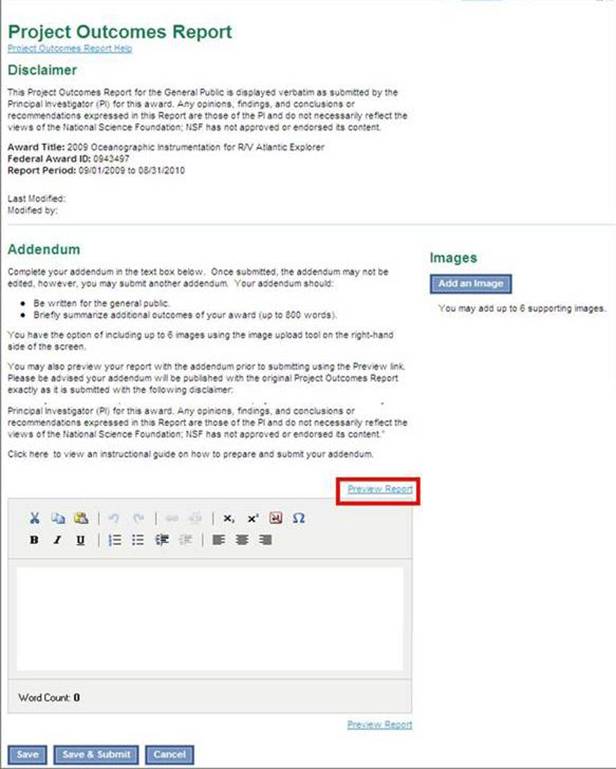
- Complete
your report in the text editing box. Your report must be between
200 and 800 words.
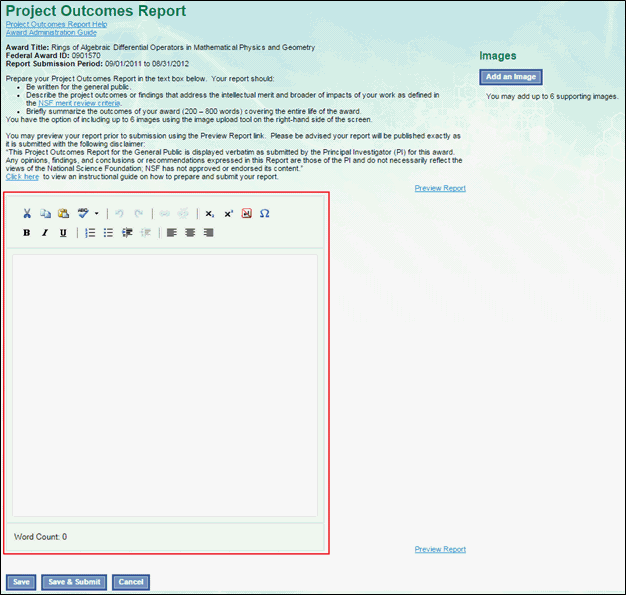
Figure
6 – Project Outcomes Report
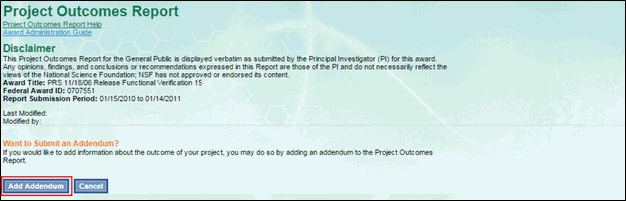
Adding
Images to Your Report
To add images to
your report:
Click the “Add
an Image” button on the Project Outcomes Report editing page
to add images to your report.
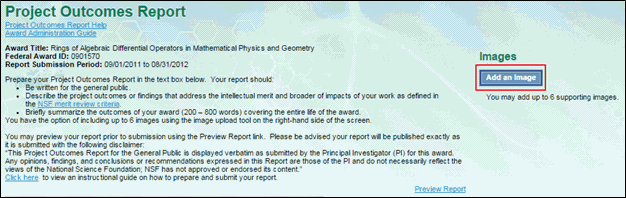
Figure
7 – Add an Image
Click Browse
to find and select the image you would like to upload. Your
image should be:
· Oriented
as landscape (width is greater than height)
· Less
than 8MB
· In
one of the following file formats: JPG, JPEG, GIF, BMP, PNG, TIFF
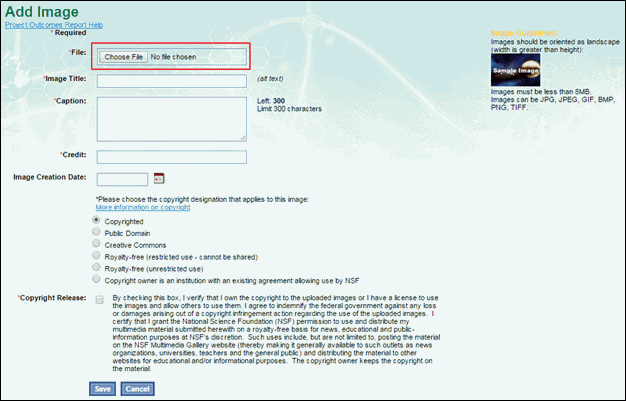
Figure
8 – Add Image page
Complete the
required information include an image title, caption (up to
300 characters), and credit.
Note: You
must have permission to use the images you upload.
Check the Primary
Image box if you would like this image to be the main image
posted with your report.
Note: If
there are no current images associated with your report, this
box will not appear and the image will automatically be made the
primary image.
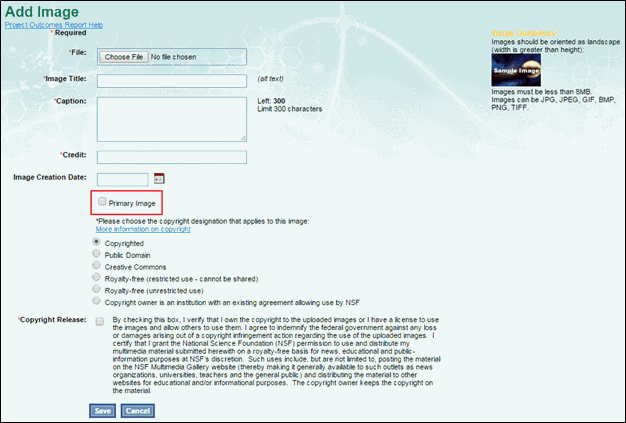
Figure
9 – Primary Image checkbox
Select the
copyright designation of your image and check the copyright
release box.
Explanation of
Copyright Release:
By checking the “Copyright
Release” box, I verify that I own the copyright to the uploaded
images or I have a license to use the images and allow others
to use them. I agree to indemnify the federal government against
any loss or damages arising out of a copyright infringement action
regarding the use of the uploaded images. I certify that I grant
the National Science Foundation (NSF) permission to use and distribute
my multimedia material submitted herewith on a royalty-free basis
for news, educational and public-information purposes at NSF’s
discretion. Such uses include, but are not limited to, posting
the material on the NSF Multimedia Gallery website (thereby making
it generally available to such outlets as news organizations,
universities, teachers and the general public) and distributing
the material to other websites for educational and/or informational
purposes. The copyright owner keeps the copyright on the material.
Definition of
Terms
The following website
is helpful in understanding copyright terms in addition to the
definitions below:
· http://stockphotolicense.com/faq
Copyrighted:
Under the copyright law, the author/creator
of the multimedia is the copyright owner unless there is a written
agreement by which the author/creator assigns the copyright to
another person or entity, such as a publisher. In cases of works
made for hire, the employer or commissioning party is considered
to be the author. For more information about copyright
see the U.S. Copyright Office website:
· http://www.copyright.gov
Public
Domain: Multimedia in
the public domain are those whose intellectual property rights
have expired, been forfeited, or are inapplicable. Multimedia
of the United States Government and various other governments
are excluded from copyright law and may therefore be considered
to be in the public domain in their respective countries. Multimedia in the public domain may be
used freely without permission. For more information about
Public Domain see the following websites:
· http://www.publicdomainsherpa.com/definition-of-public-domain.html
· http://en.wikipedia.org/wiki/Public_domain
Creative Commons:
Creative Commons licenses enable copyright owners to state specifically
how others may use their multimedia. Some Creative Commons licenses,
for example, permit others to copy, make derivative works or adaptations,
or to distribute the multimedia, under specific conditions, such
as requiring attribution (credit). See the terms of the license
for credit requirements and restrictions. For more information
about Creative Commons and types of licenses see the following
website:
· http://creativecommons.org/
Royalty-free (restricted
use – cannot be shared): This category refers to royalty-free
multimedia that someone pays to use. The buyer may reuse the multimedia
without additional payment, but may not share it with others.
Royalty-free (unrestricted
use): This category refers to multimedia from free royalty-free
sites that anyone may use, as long as the terms of use on the
site are followed.
For more information
about royalty-free multimedia see the following website:
· http://stockphotolicense.com/faq
Copyright owner
is an institution with an existing agreement allowing use by NSF:
Some institutions have given NSF “blanket permission” to use specific
kinds of multimedia. Please check with your Public Information
Officer (PIO) to see whether your multimedia is covered by such
an agreement.
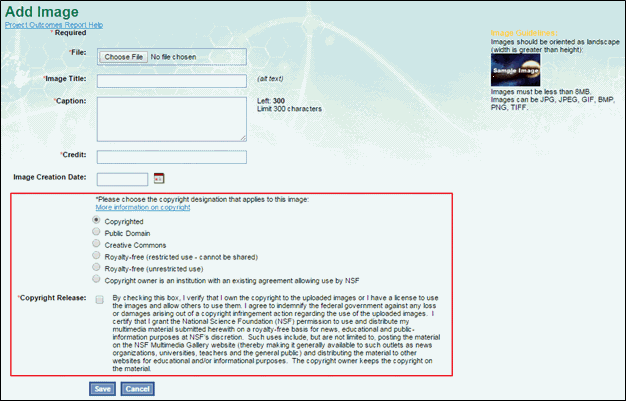
Figure
10 – POR Copyright Release
Click Save
to add the image to your report.
To preview
your image, select Preview under the image you would like
to view.
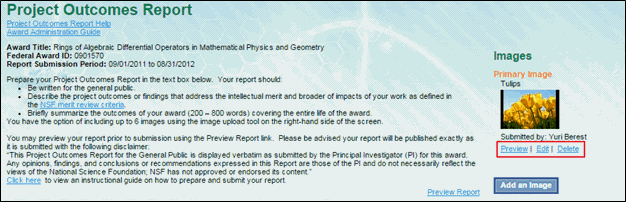
Figure 11 – POR Image options
To edit your
image’s caption or credit, select Edit under the image you
would like to revise, edit the necessary information, and
select Save.
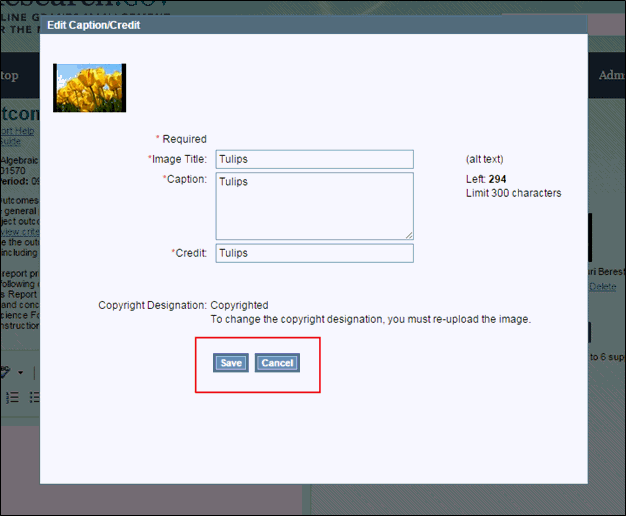
Figure 12 – POR Edit Image
To delete
your image, select Delete under the image. You will be asked
to confirm that you wish to delete the image.
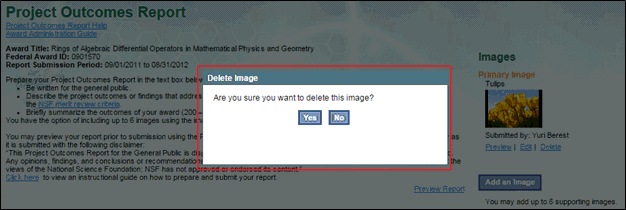
Figure
13 – POR Delete Image
Saving
and Returning to Your Report, Later
To save your report:
Click Save
at the bottom of the report editing page.
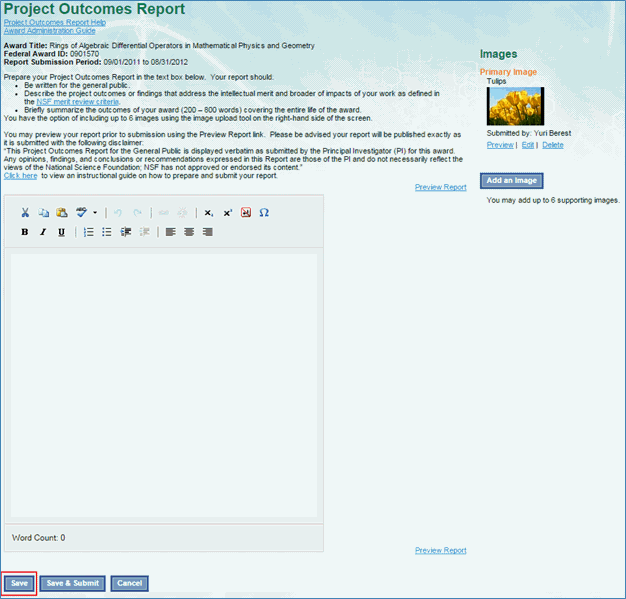
Figure
14 – Save Project Outcomes Report
To return to your
report:
If you have logged
out of Research.gov, log into Research.gov then log into the Project
Reporting system (for instructions, refer to instructions for
accessing your report).
Select Create/Edit
Report for the report you would like to continue editing.
You will be directed to your saved report.
Figure
15 – Project Reports
Previewing
Your Report
To preview your report:
Click Preview
Report at the bottom of the report editing page.
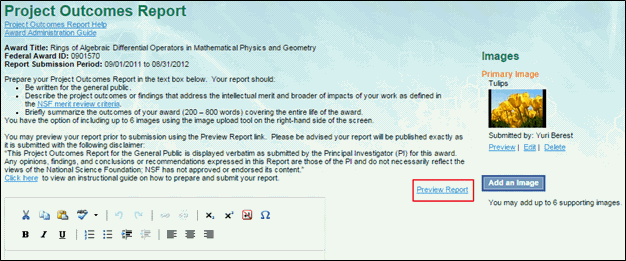
Figure 16 – Preview
report
You will see
a preview of your report and images. Click Close Preview to
close the preview window.
Submitting
Your Report
To submit your report:
Click Save
and Submit at the bottom of the report editing page.
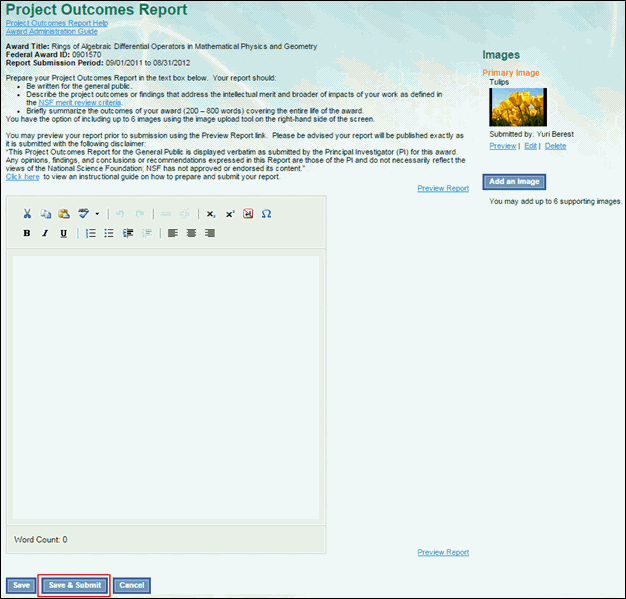
Figure 17 – Save and Submit report
You will see
a confirmation screen notifying you that your report has been
successfully submitted. Additionally, you will receive
an email confirming your report submission.
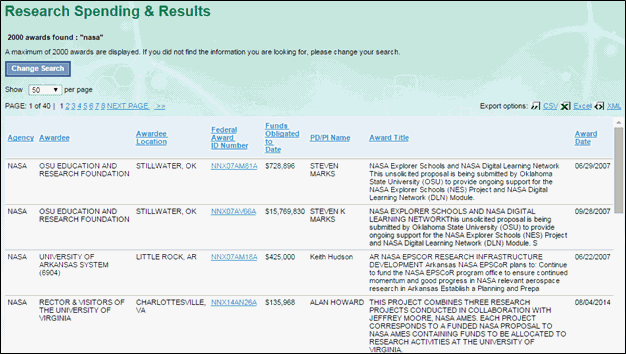
Note: Once
your report has been submitted, you have 30 days to edit your
report. To view your report after submission, follow the
instructions outlined for returning to your report. Following
submission, your report will be available on your award’s detail
page in the Research Spending & Results service on Research.gov
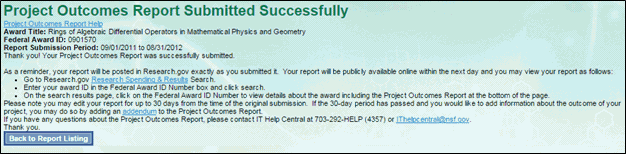
Figure
18 – POR Submission Confirmation
Editing
Your Submitted Report
To edit your submitted
report during the 30 day editing period, refer to the instructions
above for accessing your report, editing a saved report, and submitting
your report.